Using Aegis With Agents
Configure OpenCode, Cline, and Claude Code Router with one Aegis key, and understand the current Codex limitation.
OpenCode
OpenCode is available as both a terminal interface and a desktop app. Both versions can use the same Aegis provider from your global OpenCode configuration, so you only need to configure Aegis once.
Follow these six steps in order: install the clients you want, create an Aegis key, add the shared provider configuration, then verify the CLI, Desktop, and Aegis Analytics.
Step 1: Install OpenCode CLI, Desktop, Or Both
Choose the OpenCode clients that match your workflow. Install the CLI for terminal sessions, Desktop for a graphical interface, or both if you want to switch between them.
- CLI on macOS, Linux, or WSL: run the official installer below.
- Desktop on macOS: use Homebrew below or download the Apple Silicon or Intel build from opencode.ai/download.
- Desktop on Windows: download the x64 installer from opencode.ai/download.
- Desktop on Linux: download the `.deb` or `.rpm` package from opencode.ai/download.
- Windows CLI users should follow the OpenCode Windows and WSL guide.
CLI — macOS, Linux, or WSL
curl -fsSL https://opencode.ai/install | bash
opencode --version
Desktop — macOS with Homebrew
brew install --cask opencode-desktopStep 2: Create Your Aegis API Key
Create a dedicated Aegis key for OpenCode before editing the shared configuration. The full `aegis_...` value is shown only once.
- Sign in to Aegis.
- Open Dashboard > API Keys.
- Enter a clear name such as `OpenCode`.
- Choose the default service tier and, if needed, set a monthly budget limit.
- Click `Generate Key`, then copy the `aegis_...` value immediately.
- Store it securely until you paste it into the global OpenCode configuration in Step 3.
Step 4: Launch And Verify OpenCode CLI
Open a terminal in your project and start OpenCode. Initialize the project on the first run, then select the Aegis model from the model picker.
- Run `/init` once to analyze the project and create `AGENTS.md`.
- Run `/models` and select `Aegis > GLM-5.2` (`aegis/glm-5.2`).
- Send a short prompt and confirm OpenCode returns a response.
cd /path/to/project
opencode

# In the OpenCode TUI:
#   /init
#   /models
Step 5: Launch And Verify OpenCode Desktop
Open OpenCode Desktop after saving the shared configuration. Desktop runs its own local OpenCode process but reads the same user-level provider configuration as the CLI.
- Fully quit and reopen Desktop if it was running while you edited `opencode.jsonc`.
- Open or select the project folder you want to work in.
- Open the model picker and select `Aegis > GLM-5.2` (`aegis/glm-5.2`).
- Start a new session and send a short prompt.
- If you installed both clients, you do not need to paste the Aegis key a second time.
Step 6: Confirm Usage And Troubleshoot
After a successful CLI or Desktop prompt, open Aegis Dashboard > Analytics and confirm the request appears. This verifies that OpenCode is using Aegis rather than another configured provider.
- Missing provider: confirm the global config is at `~/.config/opencode/opencode.jsonc` and the provider ID is exactly `aegis`.
- Authentication error: replace `your_aegis_api_key_here` with the real key copied in Step 2.
- Missing model: confirm `glm-5.2` exists under `provider.aegis.models`, then reopen `/models` or restart Desktop.
- Wrong model in one project: check that project's `opencode.json` or `opencode.jsonc` for an override.
- Desktop still shows old settings: fully quit the application, reopen it, and load the project again.
- No Analytics event: confirm the endpoint is exactly https://api.aegisrouter.com/v1, send another prompt, and refresh Analytics.
Cline
Cline supports OpenAI-compatible providers directly from its settings panel.
- Open the Cline settings panel.
- Set `API Provider` to `OpenAI Compatible`.
- Set `Base URL` to https://api.aegisrouter.com/v1.
- Paste your `aegis_...` key into the API key field.
- Enter a model ID from the Aegis Models page, such as `glm-5.2` or `qwen3.6-35b`.
Claude Code
Claude Code Router (CCR) connects Claude Code to Aegis. CCR runs a local gateway at `127.0.0.1:3456`, sends Claude Code requests to Aegis's OpenAI-compatible endpoint, and translates the responses back for Claude Code.
The current CCR Desktop setup uses a guided wizard: Choose provider, Add credentials, Pick models, Verify connection, Connect agent, then Let's start.
Step 1: Download Claude Code Router Desktop
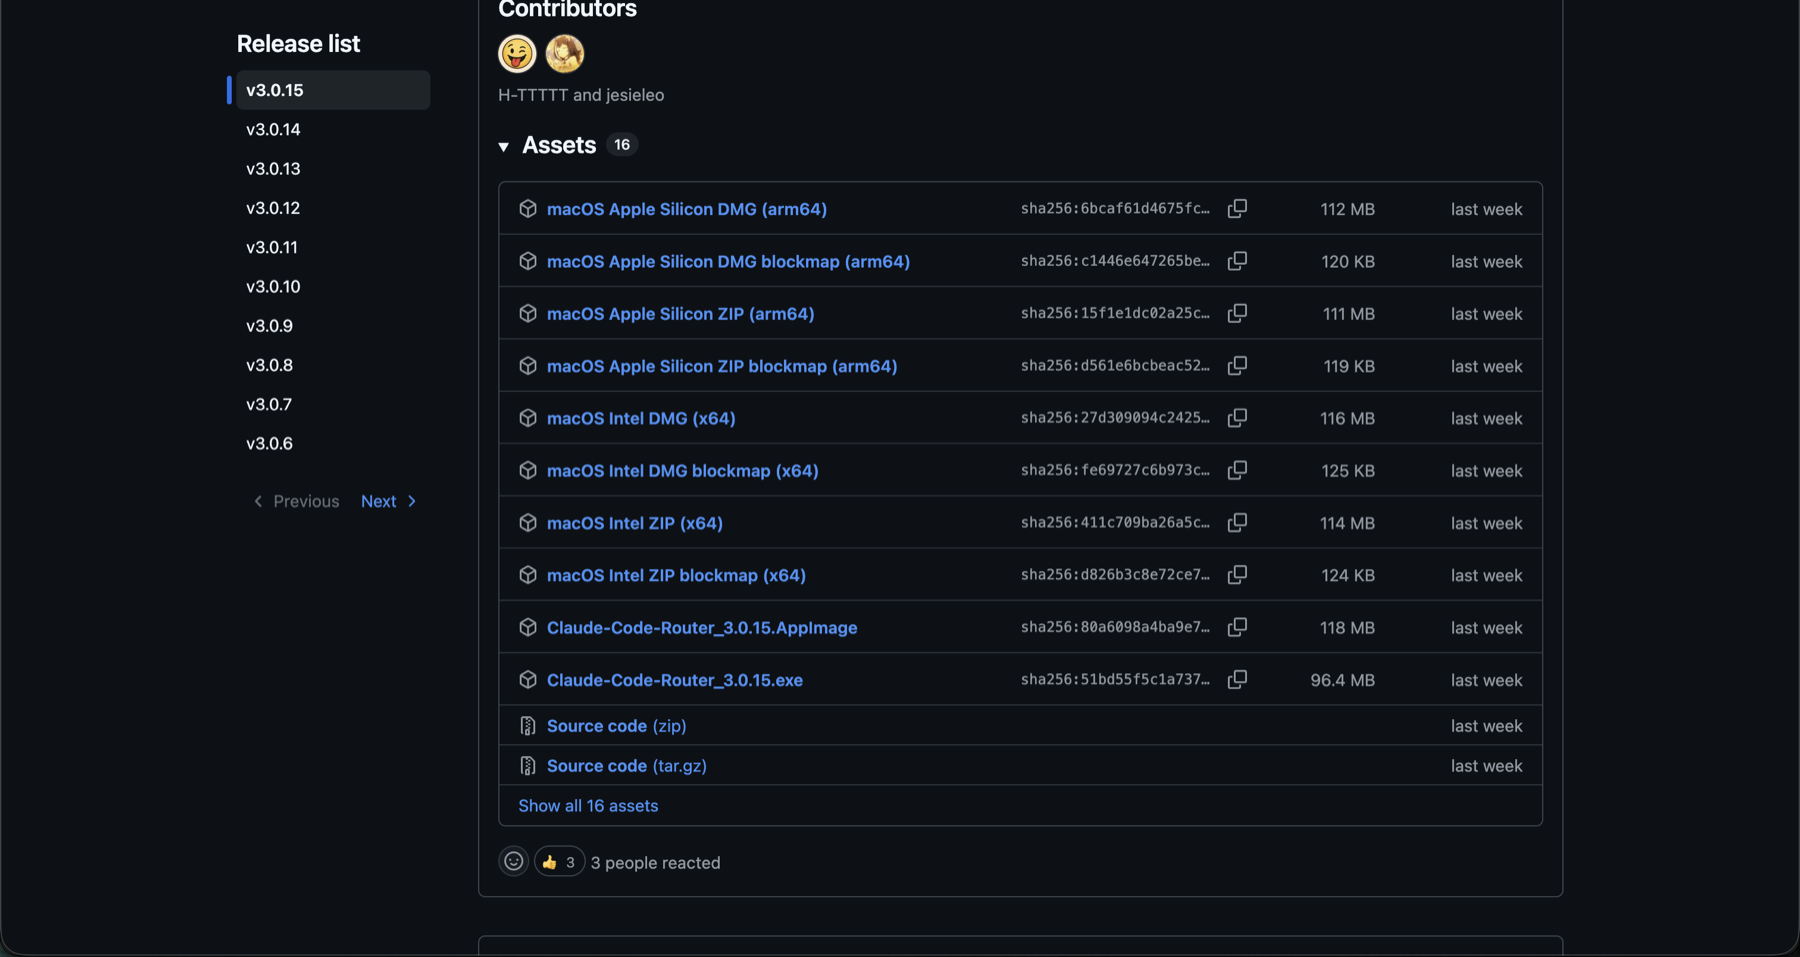
Open the Claude Code Router Releases page, expand `Assets`, and download the installer for your operating system.
- macOS Apple Silicon: choose the `arm64` DMG.
- macOS Intel: choose the `x64` DMG.
- Windows: choose the `.exe` installer.
- Linux: choose the `.AppImage` file.
- Install the app, launch it, and leave it running.
Step 2: Download Claude Code
Install Claude Code as a desktop app, a command-line tool, or both. CCR can configure both entry modes.
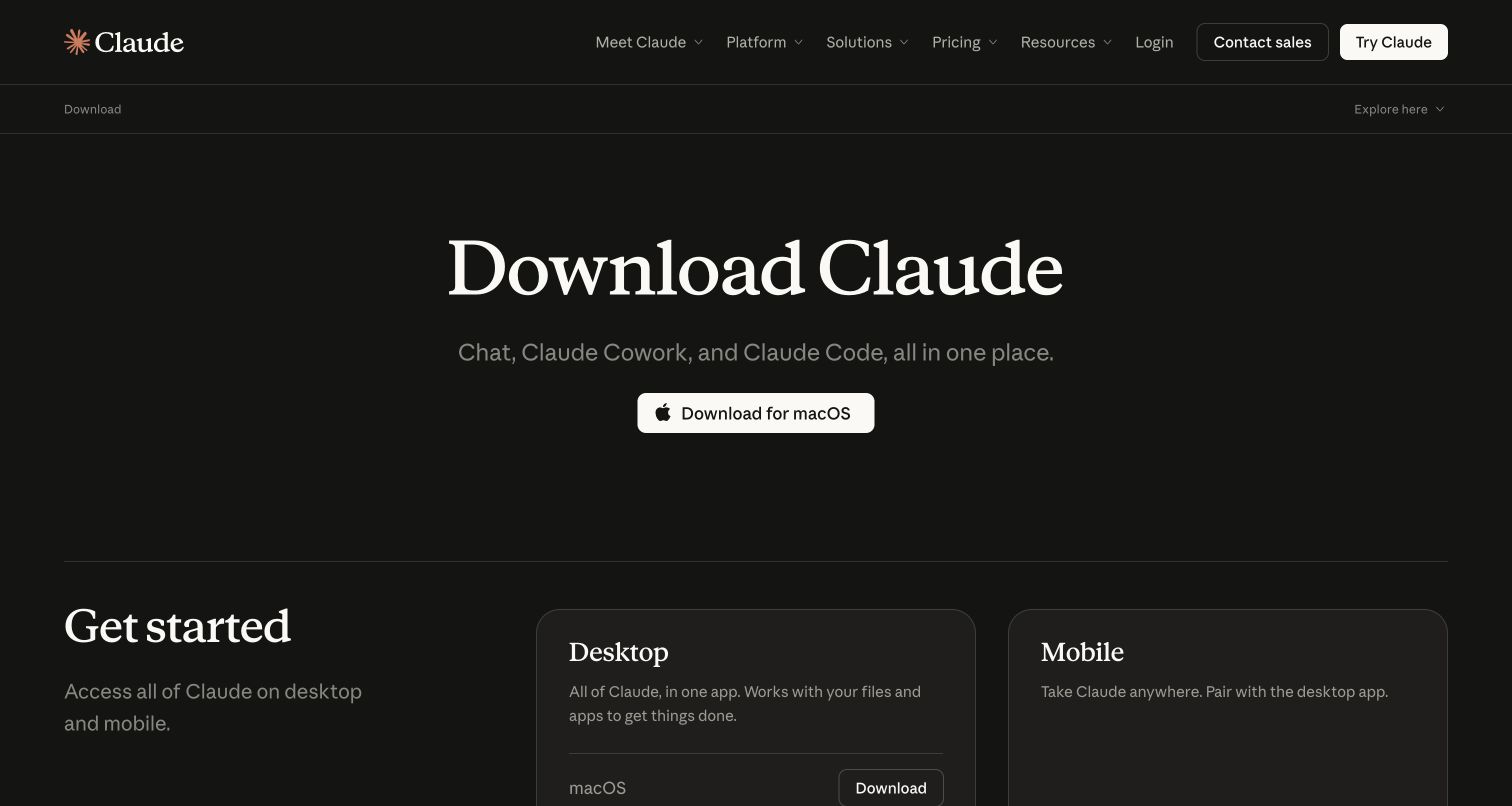
- Desktop: open claude.com/download, download the app for your OS, and install it.
- CLI: run the native installer for your operating system below, then verify the installation with `claude --version`.
- If you want to use Claude Code from both the desktop app and your terminal, install both.
macOS, Linux, or WSL
curl -fsSL https://claude.ai/install.sh | bash
claude --version
Windows PowerShell
irm https://claude.ai/install.ps1 | iex
claude --version
Step 3: Create An Aegis API Key
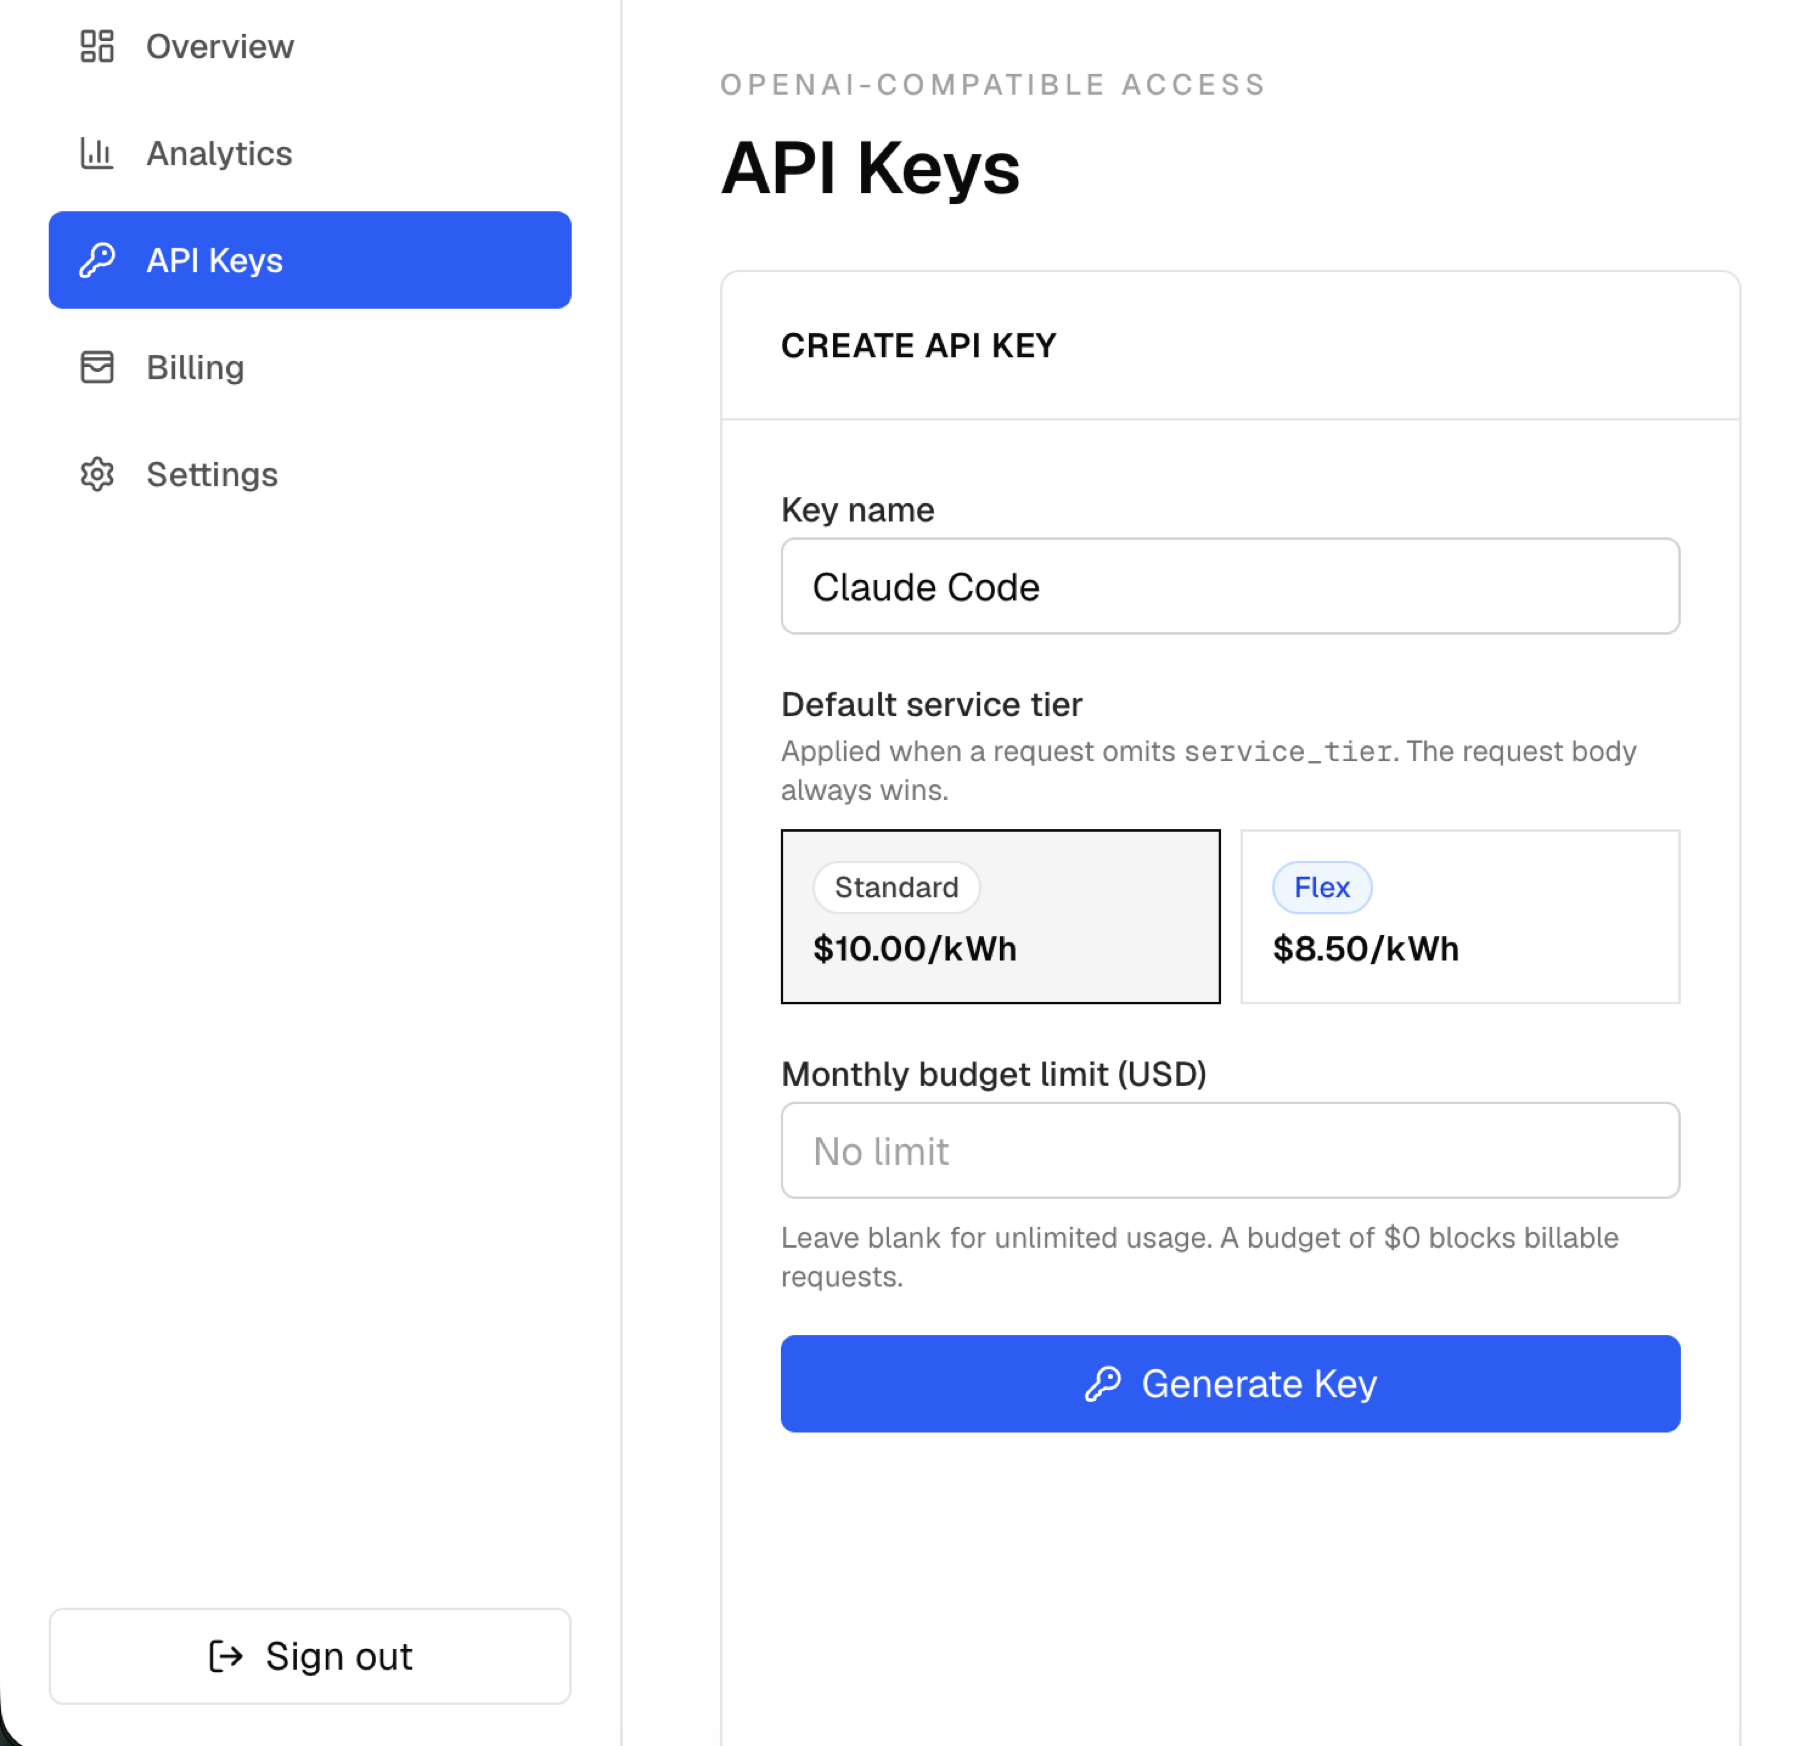
Sign in to Aegis, open `API Keys`, and create a key for Claude Code. The full `aegis_...` value is shown only once, so copy it immediately.
- Enter a clear key name, such as `Claude Code`.
- Choose the default service tier you want this key to use.
- Optionally set a monthly budget limit.
- Click `Generate Key`, copy the full key, and store it securely.
Step 4: Configure The Aegis Provider
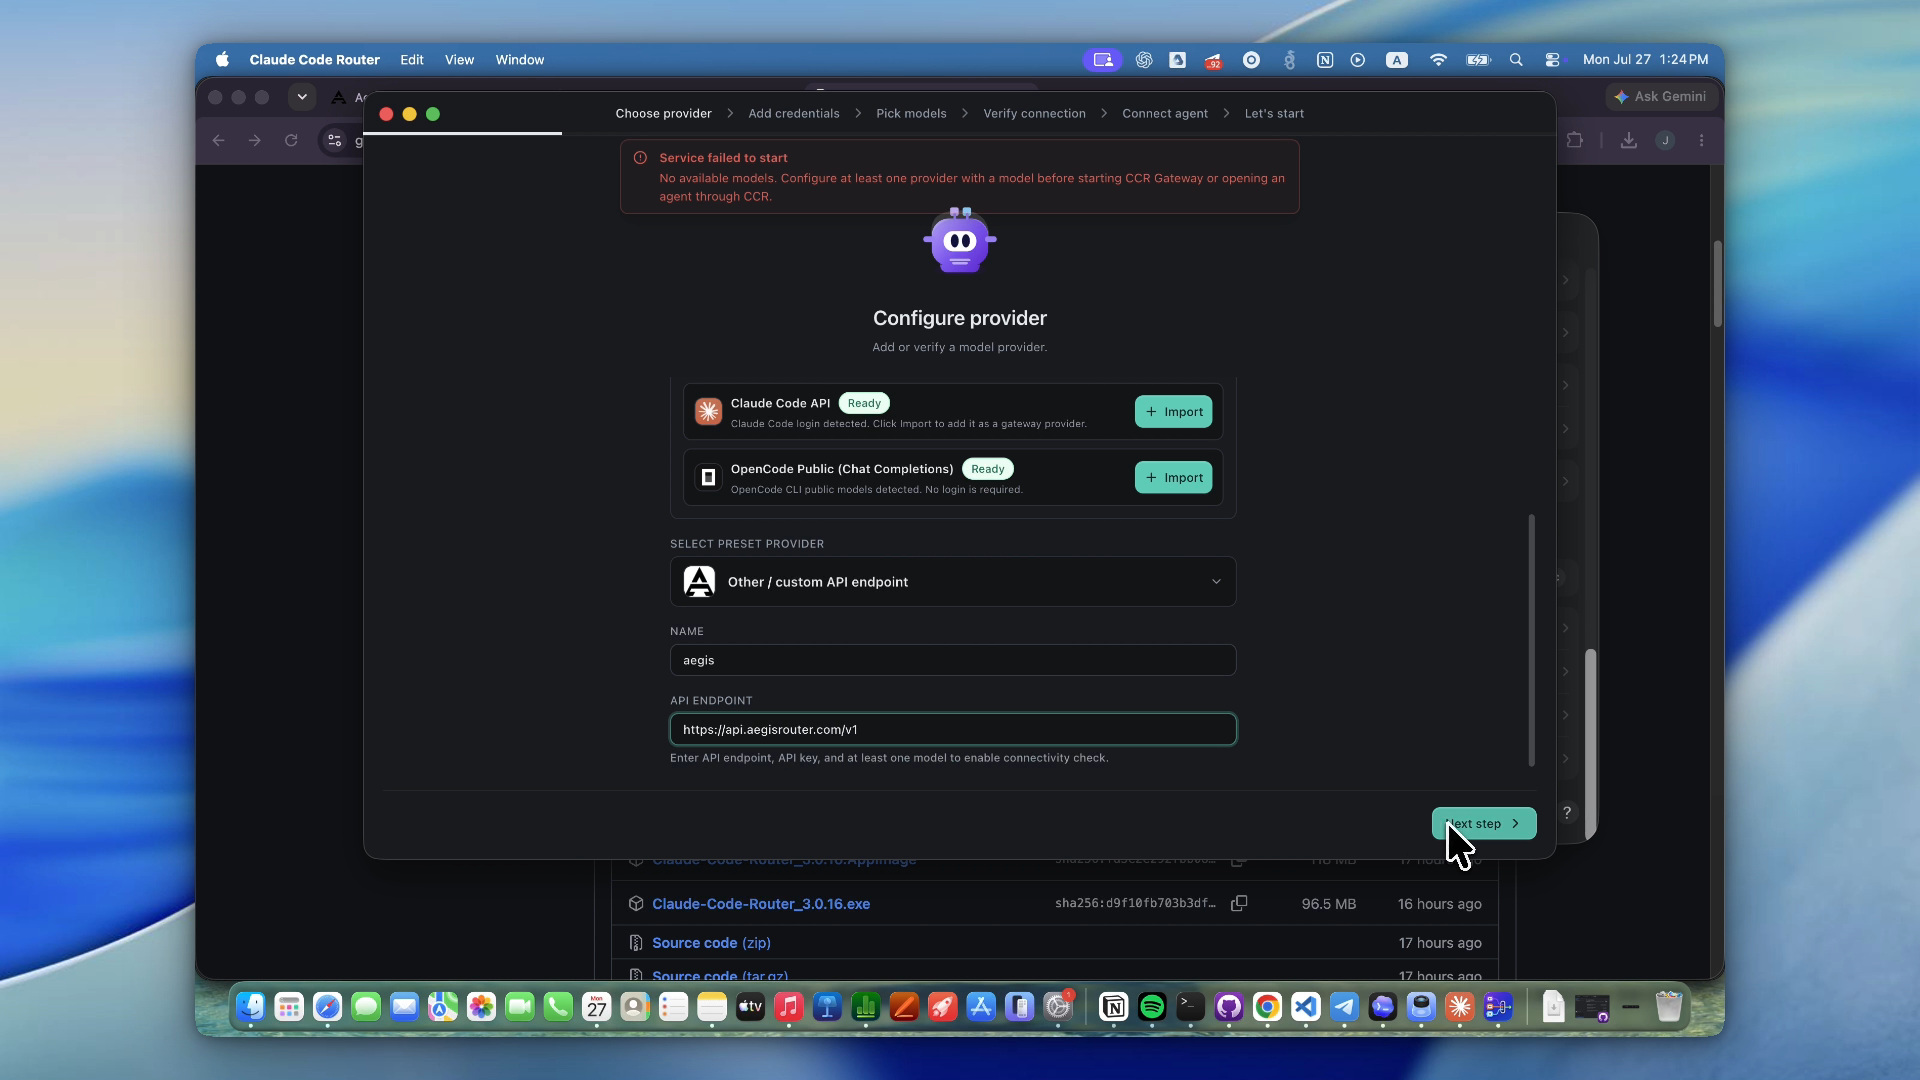
Open CCR Desktop. On a fresh install, the Configure provider wizard opens automatically. Otherwise, open `Providers`, click `Add`, and choose `Other / custom API endpoint`.
- Name: `aegis` (or another short, clear provider name).
- API endpoint: https://api.aegisrouter.com/v1.
- Click `Next step`, select `API key`, and paste the `aegis_...` key from Step 3.
- Do not select `Credential pool` unless you intentionally want CCR to rotate between multiple Aegis keys.
Step 5: Pick Models And Verify The Connection
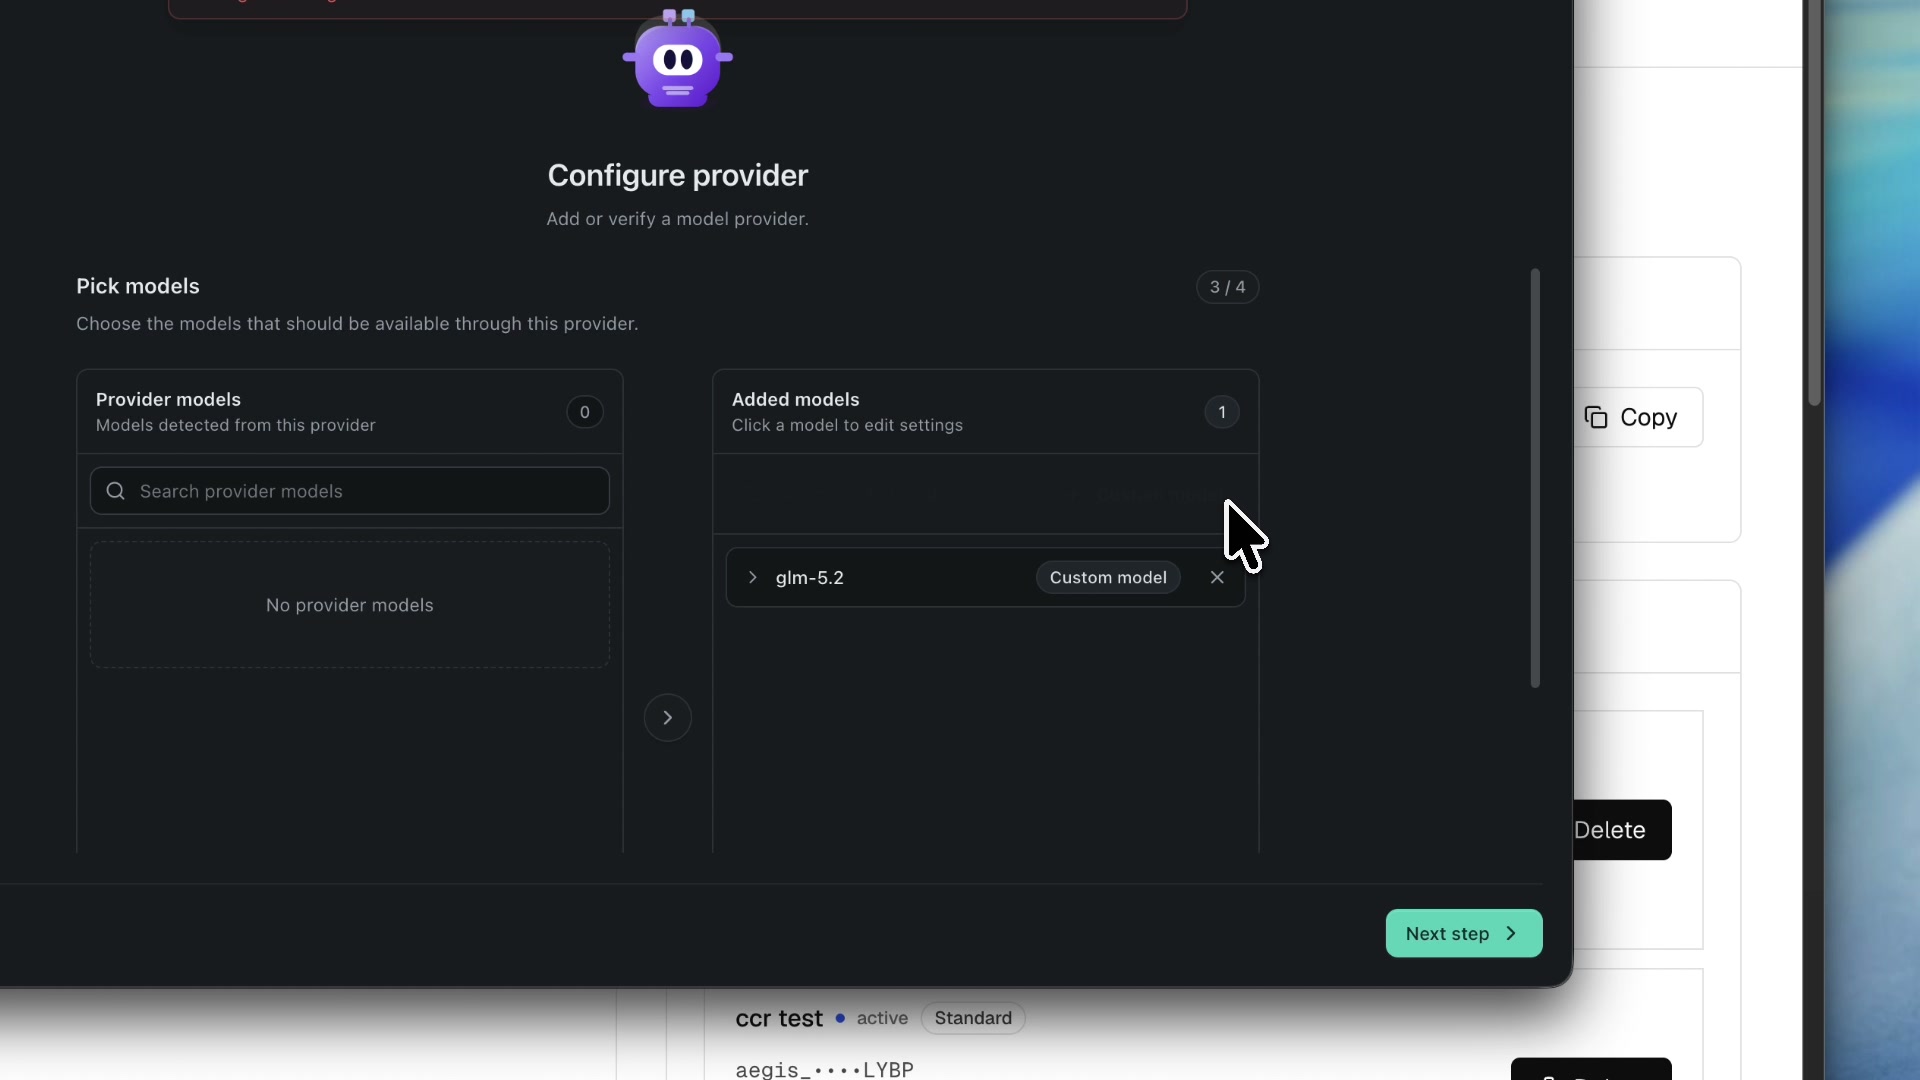
On `Pick models`, move the Aegis models you want to the Added models column. Continue to `Verify connection` and run `Check Connection` before creating the Claude Code profile.
- If Provider models loads normally, select `glm-5.2` or any other supported model you want to expose.
- If it says `No provider models`, click `Custom model`, enter `glm-5.2` exactly, and confirm it. You do not need to wait for automatic discovery.
- On `Verify connection`, wait for the protocol check, then click `Check Connection` to send a small real request.
- Continue only after the connection succeeds.
Step 6: Connect The Claude Code Profile
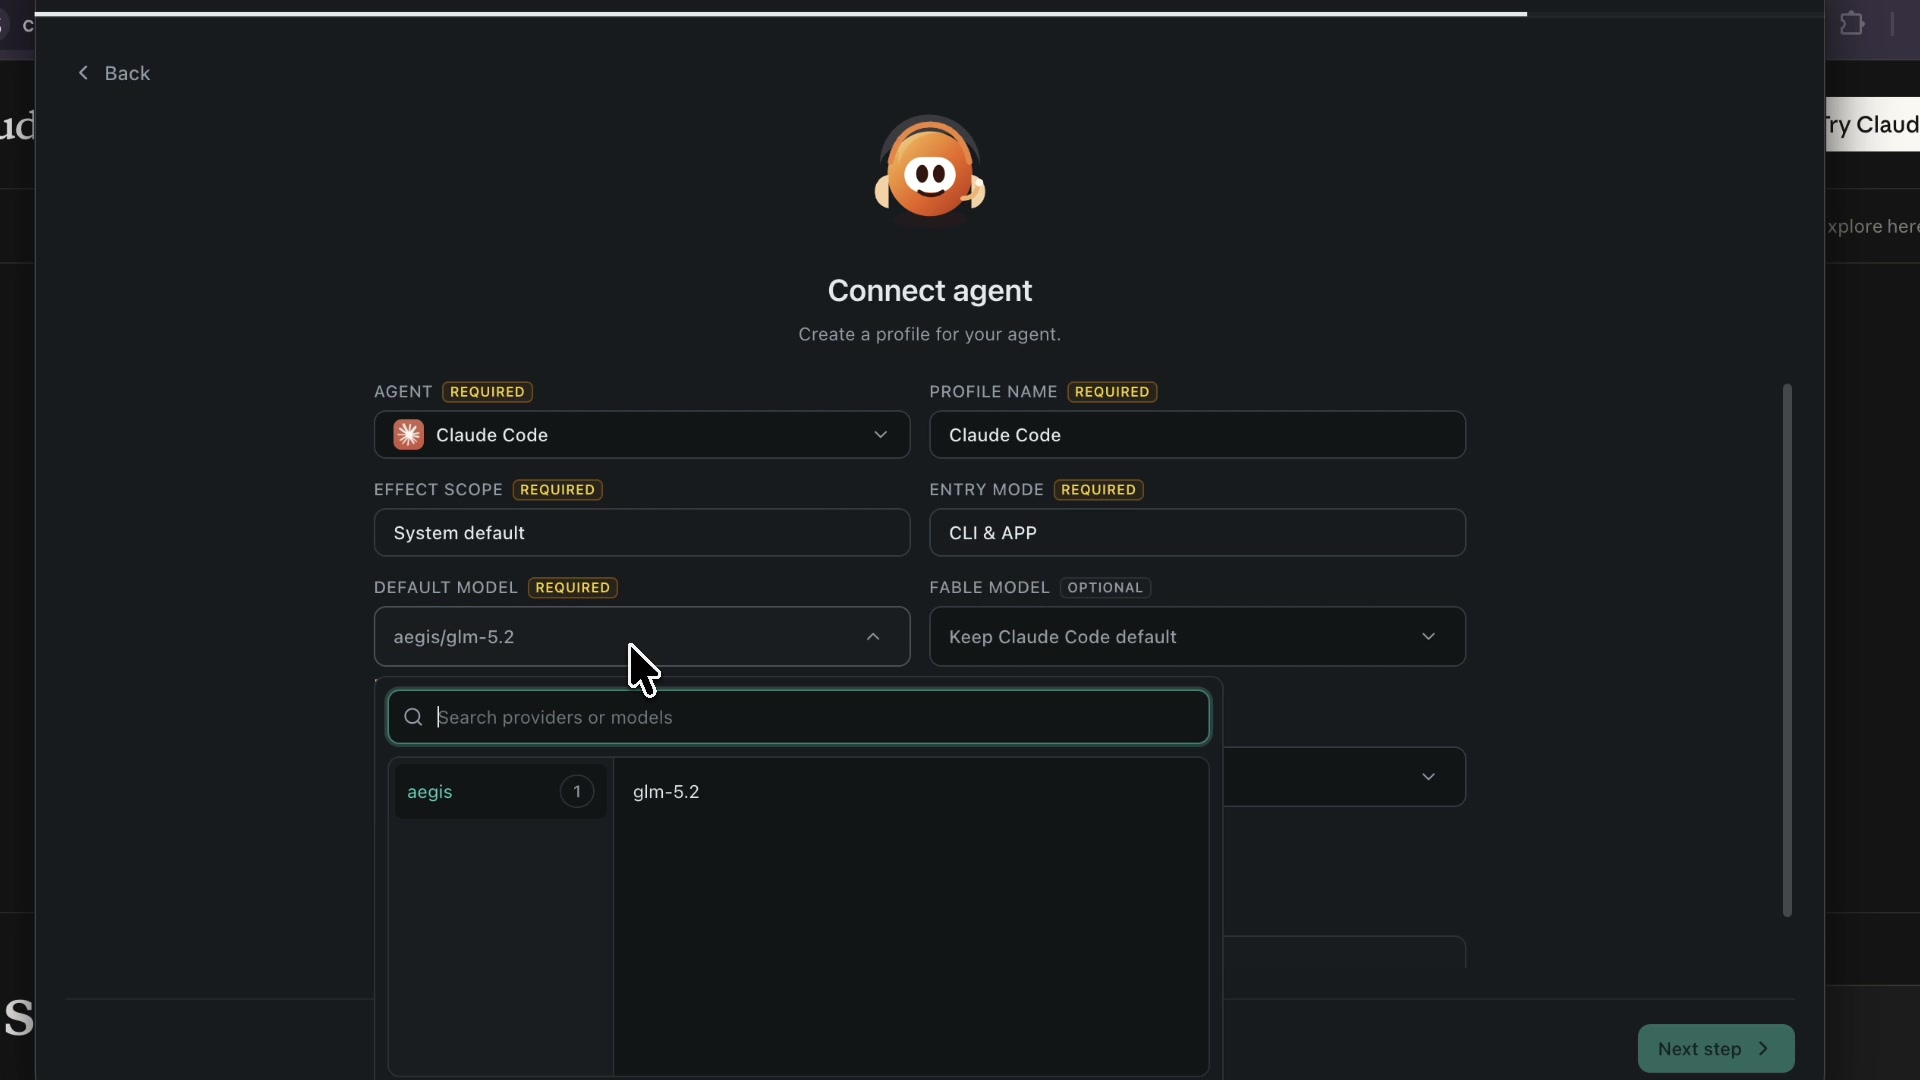
On `Connect agent`, create the Claude Code profile using the settings below. The new CCR interface calls this an Agent Profile.
- Agent: `Claude Code`.
- Profile name: `Claude Code`.
- Effect scope: `System default`.
- Entry mode: `CLI & APP` when both are installed; otherwise select the entry mode you use.
- Default model: `aegis/glm-5.2`.
- Fable, Opus, Sonnet, and Haiku model aliases are optional. Leave them on `Keep Claude Code default` unless you want explicit per-alias routing.
- Click `Next step` and make sure Provider and Profile both show a green check on `Let's start`.
Step 7: Start CCR And Test Claude Code
Click `Let's start`. CCR should start its local endpoint at `http://127.0.0.1:3456`. Leave CCR Desktop running, open Claude Code in the desktop app or terminal, select an Aegis model if prompted, and send a short test request.
- Confirm the Claude Code profile is enabled under `Agent Profiles`.
- Send a short prompt, then open Aegis Dashboard > Analytics and confirm the request appears.
- `EADDRINUSE: address already in use 127.0.0.1:3456` means another CCR process already owns the port. Quit the duplicate Desktop or CLI instance, then start one CCR instance.
- `400 All target providers failed` is a CCR wrapper error. Open `Logs` and inspect the target attempt, then recheck the `/v1` endpoint, Aegis key, selected model ID, and detected protocol.
- If only the CLI works, edit the profile and change Effect scope to `System default` and Entry mode to `CLI & APP`, then fully restart Claude.
curl http://127.0.0.1:3456/

# Then launch Claude Code and send a short test prompt.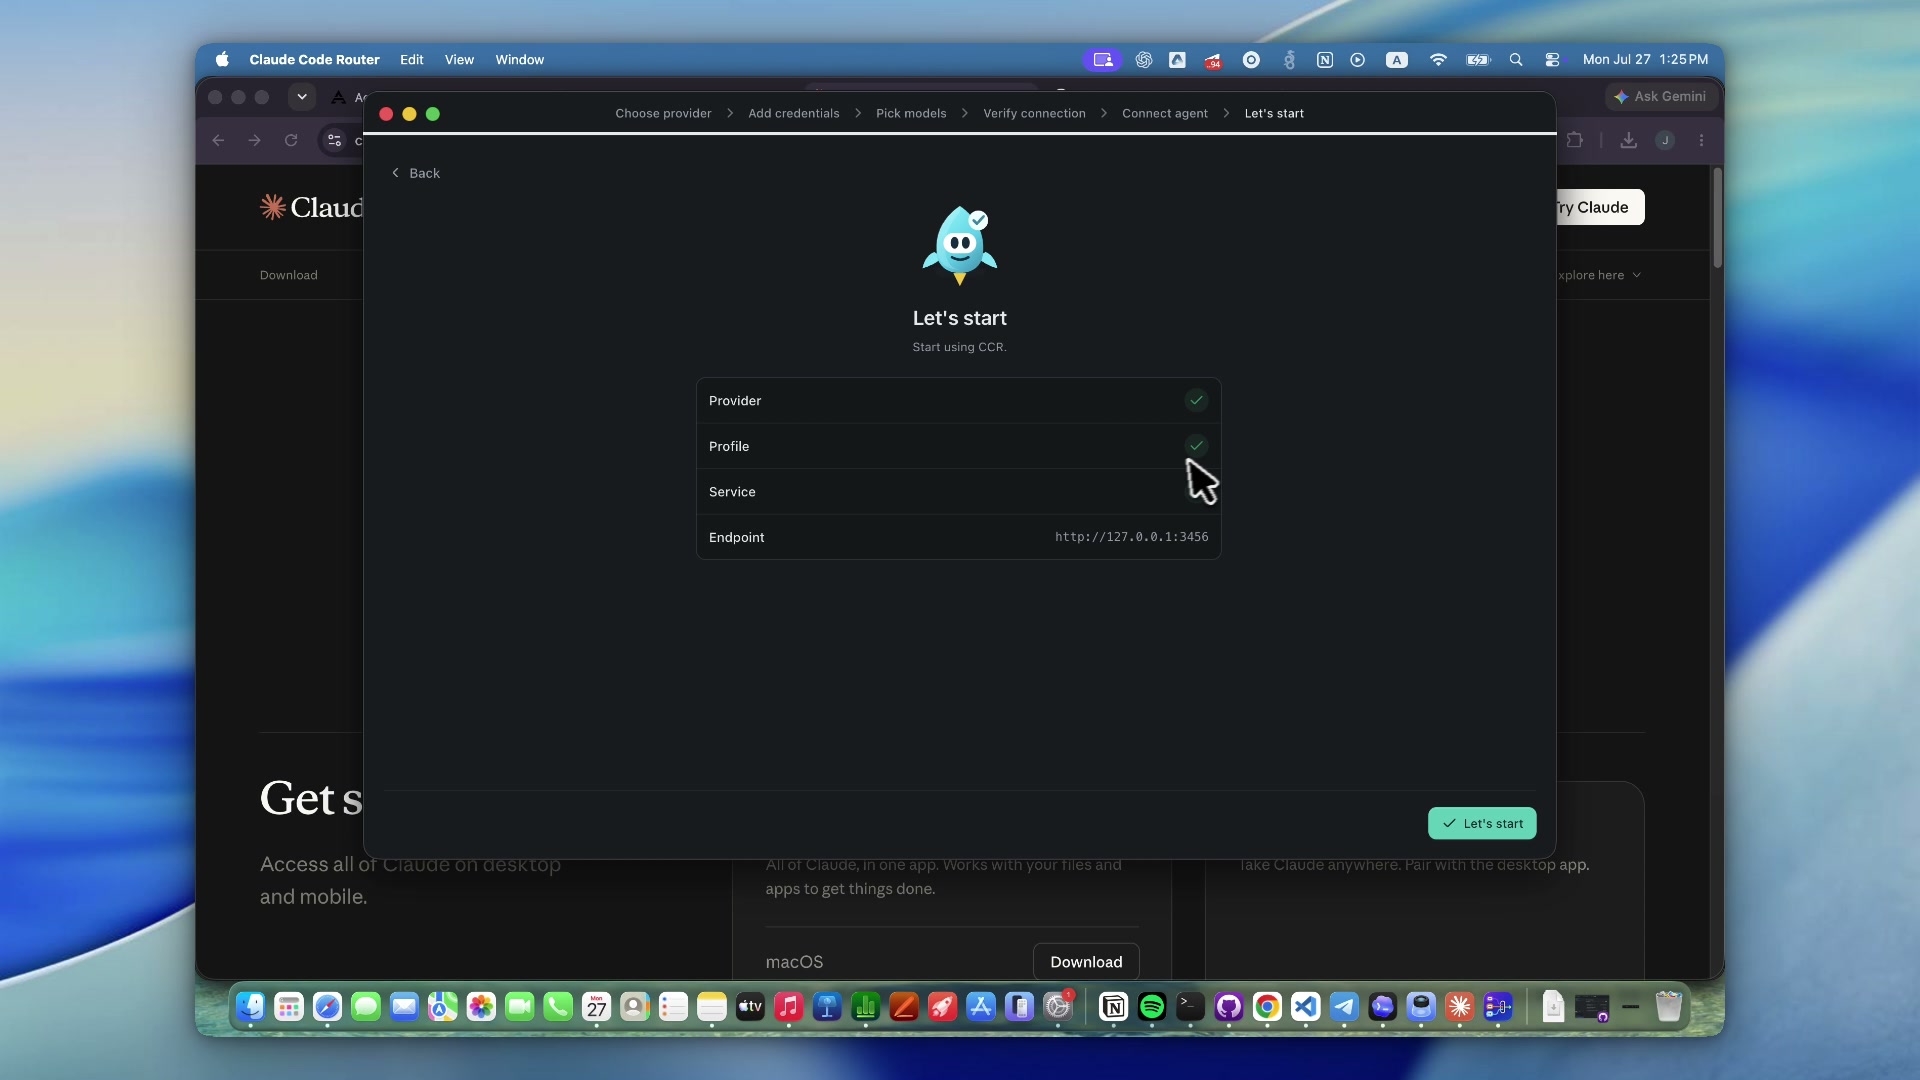
Connecting Claude Desktop Directly (No Router)
Aegis also exposes a native Anthropic-compatible `/v1/messages` endpoint, so Claude Desktop and other Anthropic-native clients can connect directly without CCR.
Point the client at the Aegis base URL, send your `aegis_...` key as `x-api-key`, and set the model to any Claude-style alias — Aegis normalizes `claude-3-5-sonnet-latest`, `claude-sonnet-*`, `claude-opus-*`, `claude-haiku-*`, and `claude-ccr-*` probes to the upstream `glm-5.2` model automatically.
curl https://api.aegisrouter.com/v1/messages \
  -H "Content-Type: application/json" \
  -H "x-api-key: $AEGIS_API_KEY" \
  -H "anthropic-version: 2023-06-01" \
  -d '{
    "model": "claude-3-5-sonnet-latest",
    "system": "You are a concise coding assistant.",
    "messages": [{"role": "user", "content": "Say hello from Aegis."}],
    "max_tokens": 128,
    "stream": false
  }'
Codex CLI
Codex CLI currently expects the OpenAI Responses API. Aegis currently documents and supports the OpenAI-compatible chat completions shape, not a direct Responses API integration.
That means you should not point Codex CLI at Aegis yet and expect full support. Use OpenCode, Cline, or Claude Code Router today for coding-agent workflows over the Aegis endpoint.